ACNH Terraforming Guide: Build Cliffs, Rivers, and Paths Without Rework
ACNH terraforming is powerful, but it becomes expensive when you start moving cliffs and rivers before the island plan is stable. This guide explains what to unlock, what to sketch first, which limits matter, and how to turn a planner map into a build order you can finish in Animal Crossing: New Horizons.
Quick Answer: What Should You Do Before Terraforming in ACNH?
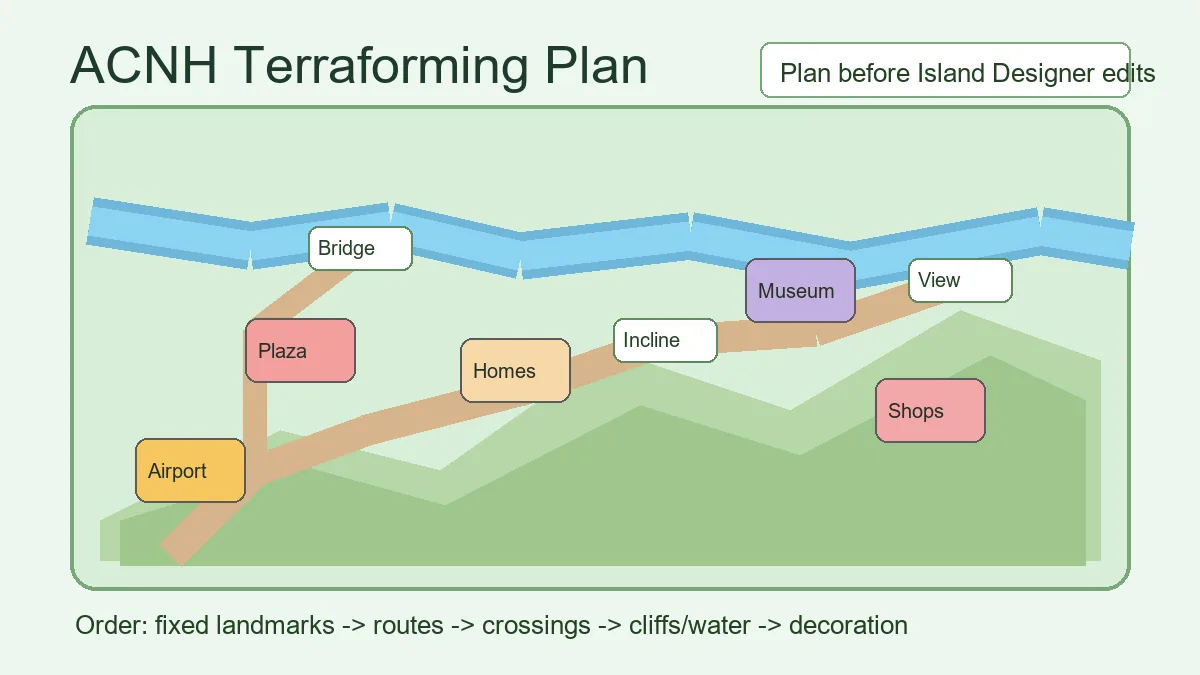
Before terraforming, finish the island story milestones that unlock the Island Designer app, then buy the waterscaping and cliff construction permits with Nook Miles. Do not begin by drawing dramatic mountains or canals. Start with fixed landmarks, building locations, daily routes, bridge and incline needs, and only then reshape terrain.
A buildable plan usually has one main entrance route, a daily errand loop, clear crossings, and enough open space around buildings. Use the ACNH island planner template to decide the structure and the map designer guide to test terrain before editing in-game.
- Unlock Island Designer, waterscaping, cliff construction, and path permits.
- Mark airport, Resident Services, river mouths, pier, beaches, rocks, and secret beach.
- Place homes, shops, museum, campsite, bridges, inclines, and main paths before cliffs.
- Terraform one zone at a time, test the walking route, then decorate after movement works.
How to Start ACNH Terraforming Step by Step
Terraforming works best when it follows a plan rather than replacing one. The goal is not to flatten everything first. The goal is to know which terrain supports the route, which water divides zones, and which cliffs create useful height without blocking daily play.
Use the planner as a low-risk draft. When the route, buildings, bridges, and inclines are settled, move into the game and build in small passes. Save screenshots between phases so you can compare the planned map against what actually feels good when walking.
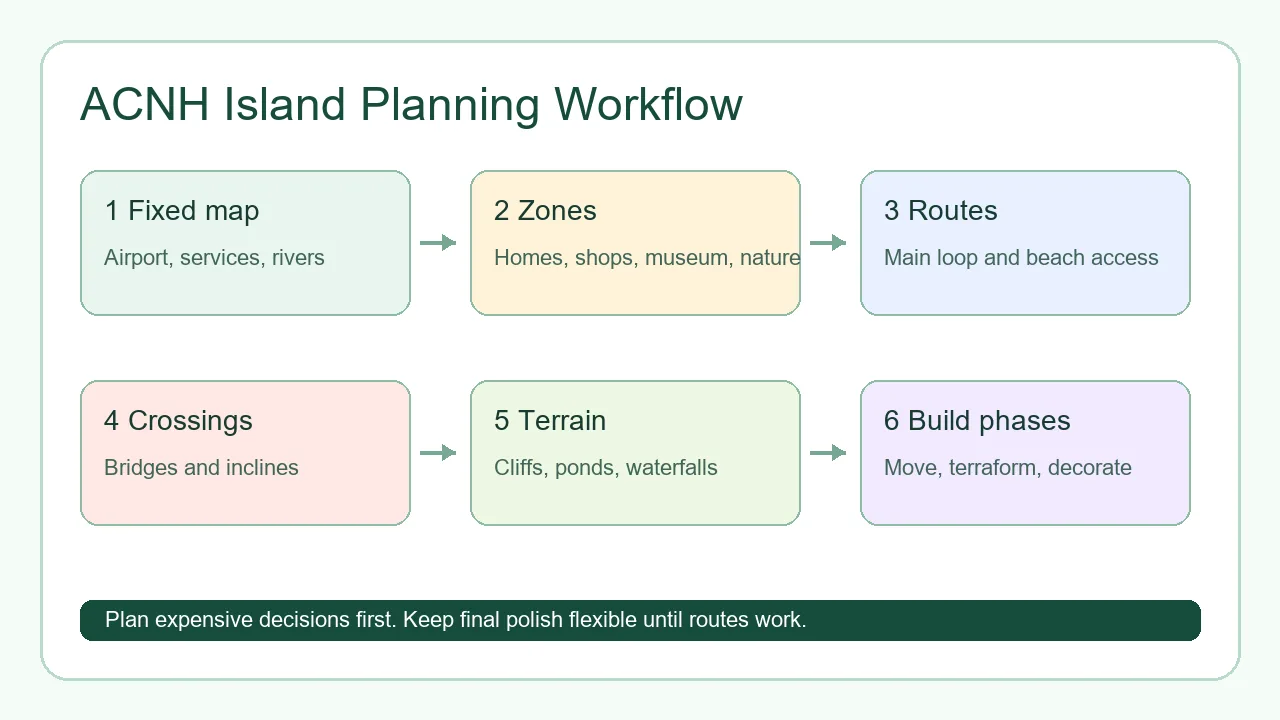
- Unlock the tools. Reach the point where the Island Designer app and construction permits are available, then decide which path, water, and cliff tools you truly need.
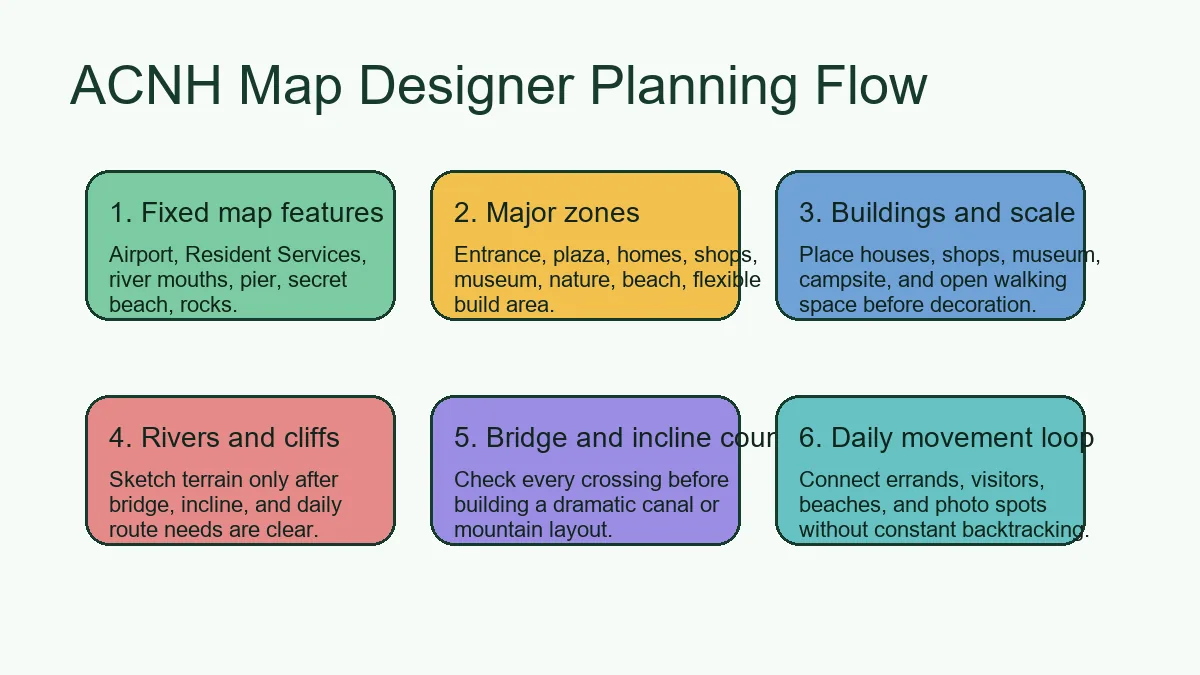
- Map fixed landmarks. Airport, Resident Services, river mouths, pier, beach rocks, and secret beach shape the island before any theme does.
- Plan movement first. Draw the entrance path, daily errand loop, beach access, shopping route, museum route, and visitor route before terrain.
- Place buildings and crossings. Homes, shops, museum, campsite, bridges, and inclines should be stable before you carve rivers or build mountains.
- Edit terrain in phases. Build the entrance, one core route, one major zone, then add secondary cliffs, ponds, waterfalls, and scenic pockets.
- Walk-test before decorating. If a path feels slow or a bridge feels wasted, fix the terrain before adding furniture, fencing, flowers, or custom designs.
6 Terraforming Decisions That Prevent Rework
Most failed terraforming projects are not caused by bad themes. They fail because routes, crossings, and scale were decided too late. Make these decisions before your first major cliff or river change.
Entrance height
Choose whether the airport route stays flat, climbs quickly, or reveals a plaza view.
- Best for
- Players redesigning the first impression of the island.
- Planner setup
- Sketch one direct route and one scenic route from the airport to Resident Services.
- Build note
- Avoid a tall entrance cliff if it hides too much of the island or forces awkward inclines.
River control
Decide which rivers are functional dividers and which are decorative water features.
- Best for
- River-heavy, cottagecore, natural, or city layouts.
- Planner setup
- Mark every bridge before widening rivers or creating canals.
- Build note
- Pretty water becomes frustrating when it blocks shops, beaches, or daily errands.
Cliff layers
Use cliffs to frame views, not to fill every empty tile.
- Best for
- Mountain, forest, museum, and overlook builds.
- Planner setup
- Reserve open walking space at the base and top of each cliff area.
- Build note
- Too many small cliff pockets make the island hard to navigate.
Bridge and incline budget
Count crossings before finalizing rivers, waterfalls, and raised zones.
- Best for
- Any island with separated neighborhoods or scenic areas.
- Planner setup
- List every daily route that needs a bridge or incline.
- Build note
- A scenic area that needs expensive access should also serve a real route or major focal point.
Path width
Choose where paths need one-tile charm and where they need two-tile comfort.
- Best for
- Busy entrances, shopping streets, museum walks, and villager neighborhoods.
- Planner setup
- Mark main routes wider than decorative side paths.
- Build note
- Narrow paths look cute in screenshots but can feel cramped during daily play.
Future flex zones
Leave one area easy to change for seasons, events, or new themes.
- Best for
- Players who redesign often.
- Planner setup
- Keep one flat or lightly shaped zone near storage, beach, or plaza access.
- Build note
- A flexible zone prevents every seasonal idea from becoming a full island reset.
Terraforming Workflow: Planner First, Island Designer Second
A useful terraforming workflow separates planning from construction. In the planner, make large decisions: routes, buildings, crossings, rivers, cliffs, and zones. In the game, test feel: camera angle, path width, furniture density, and whether a route is pleasant to walk.
The ACNH Island Designer guide covers the broader planner workflow, while this page focuses on terrain construction choices. Use both when you want a map that looks good and still works for daily play.
| Stage | Decide in the planner | Test in-game |
|---|---|---|
| Before terraforming | Fixed landmarks, main zones, building moves, bridge and incline needs. | Whether the airport route and plaza connection feel natural. |
| First terrain pass | Main route, core river changes, essential cliffs, first crossings. | Walking speed, camera visibility, and whether paths feel too narrow. |
| Second terrain pass | Secondary ponds, waterfalls, overlooks, beaches, and scenic pockets. | Whether each scenic area has a reason to exist and an easy exit. |
| Final polish | Furniture zones, fencing, flowers, custom paths, and seasonal swaps. | Screenshots, object density, laggy-feeling clutter, and visitor clarity. |
ACNH Terraforming: How to Unlock It, When to Start, and What to Build First
Similarweb phrase, related, and question tabs show demand around how to terraform in Animal Crossing, when can I terraform in ACNH, and how to get terraforming in ACNH. These are direct support questions for this existing guide, so the answers stay here rather than becoming new pages.
The practical sequence is unlock Island Designer, mark fixed landmarks, plan routes and crossings, then edit one terrain zone at a time. Use the ACNH island planner template before spending time on rivers, cliffs, waterfalls, or paths.
Unlock terraforming before you plan the terrain
Progress the island development milestones until Island Designer is available, then buy only the path, waterscaping, and cliff construction permits needed for the next phase.
- Check the app and permit requirements before editing.
- Do not confuse an online planner with the in-game tool.
When to start terraforming
Start when fixed landmarks, building locations, the main route, and essential bridge or incline needs are understood. Waiting for a usable plan prevents a full reset.
- Walk-test the airport-to-services route first.
- Keep one flexible zone for later changes.
How to terraform without rework
Edit one zone in passes: main route, functional water or cliffs, crossings, then scenic details. Simplify any feature that blocks daily movement.
- Save a map or screenshot before each major pass.
- Decorate only after routes and exits work.
Future-page flag
A dedicated beginner page for unlocking terraforming could be useful later, but this existing guide already answers unlock, timing, and build-order questions.
- Do not create a new page from Similarweb candidates here.
- Keep moon builds, house builds, and unrelated sandbox terms out of this guide.
ACNH Terraforming Checklist
Use this checklist before spending Nook Miles, Bells, and hours reshaping your island.
Plan readiness
- Island Designer app and needed permits are unlocked.
- Airport, Resident Services, river mouths, pier, and beaches are marked.
- Homes, shops, museum, campsite, and daily routes have planned locations.
- Bridges and inclines are counted before major water or cliff edits.
Build readiness
- The entrance route works before decoration begins.
- Each cliff or water feature supports a route, view, or zone boundary.
- There is enough room around buildings for paths and furniture.
- One flexible area remains easy to redesign later.
Common ACNH Terraforming Mistakes
These mistakes are common because terraforming gives you freedom before it gives you a finished plan.
- Flattening the whole island without a replacement map. A blank island can feel freeing for one day and overwhelming for weeks. Flatten only when you already have a staged rebuild plan.
- Building cliffs before routes. Cliffs decide where inclines go, so they should follow the walking plan rather than block it.
- Using water as decoration only. Ponds, canals, and waterfalls need space, crossings, and exits. If they slow every errand, simplify them.
- Copying a screenshot without matching fixed landmarks. Your airport, plaza, river mouths, and beaches may make the same idea impossible without adjustment.
- Decorating too early. Furniture hides route problems. Finish movement and terrain first, then add items and plants.
Useful References for Terraforming
Use these references to connect game mechanics with a practical planning workflow.
- ACNH Slumber Island Guide - Plan Slumber Island concepts, shared build zones, and safe experiments before applying risky terrain ideas to your main island.
- ACNH Island Planning Guide - Internal guide for turning a rough island idea into zones, routes, and build phases.
- ACNH Map Designer Guide - Internal guide for testing fixed landmarks, terrain, bridges, and inclines before building.
- Nookipedia: Island Designer - Community reference for the Island Designer app and related permits.
- Nookipedia: Permit - Community reference for construction permits used by Island Designer.
- ACNH Island Layout Ideas - Use these layout patterns before committing to large cliff, water, bridge, or incline edits.
ACNH Terraforming FAQ
How do you unlock terraforming in ACNH?
Progress through the island development goals until the Island Designer app becomes available, then buy the waterscaping and cliff construction permits with Nook Miles.
Should I flatten my island before terraforming?
Only flatten if you already have a replacement plan. For most players, phased terraforming is safer because it preserves working routes and reduces decision fatigue.
What should I terraform first?
Start with the main route from the airport to Resident Services, then core building zones, essential crossings, and only then decorative cliffs, ponds, waterfalls, and scenic areas.
How many bridges and inclines should I plan before terraforming?
Plan every bridge and incline that supports daily routes before carving major rivers or cliffs. If a zone needs too many crossings for one small scene, simplify the terrain.
Does this replace an island planner or map designer?
No. This guide explains how to build terrain; the planner and map designer help you test the layout before spending time and Bells in-game.
How do I get terraforming in ACNH as quickly as possible?
Progress the island story until the Island Designer app is available, then unlock the needed construction permits with Nook Miles. Speed matters less than having a route and building plan ready before you start editing cliffs or rivers.
When can I start terraforming in Animal Crossing?
You can start after the island development progress unlocks the Island Designer app. Then buy the waterscaping and cliff construction permits you need, confirm your main routes and crossings, and begin with a small terrain zone instead of flattening the whole island.
Plan the Terrain Before You Build It
Use the planner to test routes, cliffs, water, bridges, inclines, and build phases before making irreversible-looking changes in-game.
Open the Free ACNH Island Planner