3D Island Planner for ACNH: What It Does and How to Use It
A 3D island planner helps you think about Animal Crossing: New Horizons as terrain, not just a flat map. Use it to test cliff layers, waterfalls, rivers, bridges, building sightlines, and neighborhood spacing before you spend time terraforming in-game.
Quick Answer: Is a 3D Island Planner Worth Using?
Yes, if your island idea depends on height, water, or long sightlines. A 3D island planner is especially helpful for checking whether a waterfall still reads clearly from a path, whether a bridge connects two useful areas, or whether a villager neighborhood feels crowded once cliffs and stairs are included.
The safest approach is to treat the tool as a visual prototype, not an official Nintendo editor or a save-file editor. The community-made developer project page is the place to check current availability. For exact grid placement and quick building decisions, pair the 3D view with the site's ACNH Island Designer guide and a simple planning checklist.
- Use 3D planning when cliffs, waterfalls, rivers, bridges, or sightlines are the hard part.
- Mark fixed features and your main walking route before adding decorative terrain.
- Keep a flatter fallback plan in case the 3D version needs too many bridges, inclines, or building moves.
- Confirm final rules and placement limits in Animal Crossing before treating the concept as a build checklist.
What a 3D Island Planner Helps You See
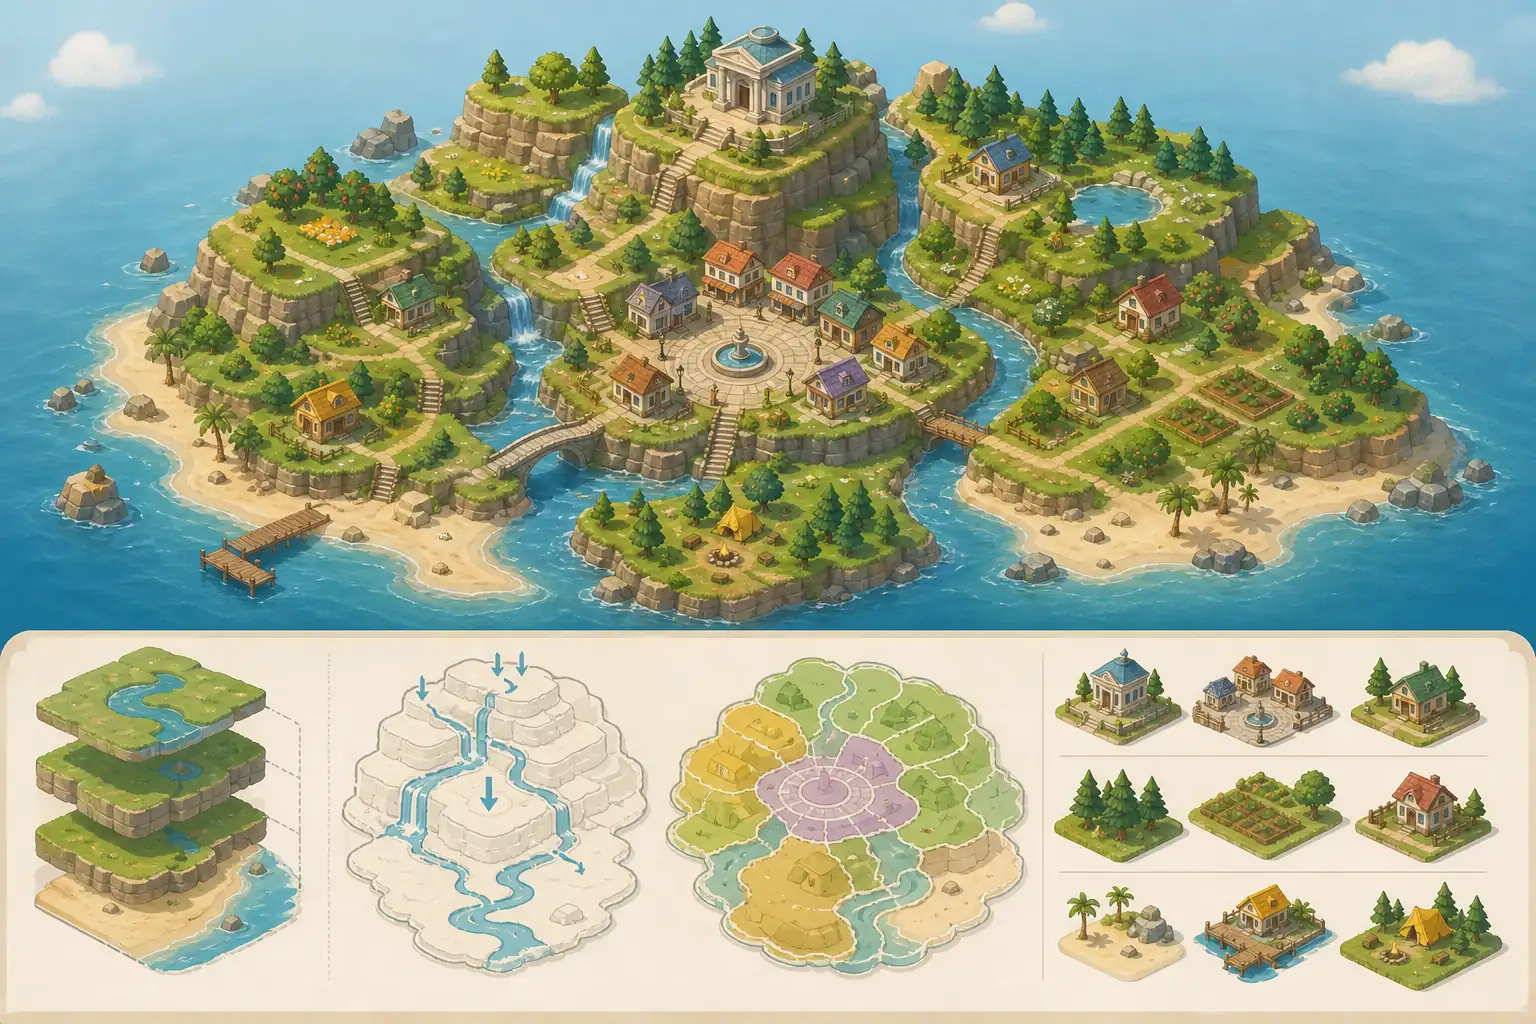
A flat map is excellent for counting spaces, but it can hide the visual consequences of elevation. A 3D island planner makes the vertical relationships easier to notice: a raised museum can block a house, a river can split a daily route, and a beautiful waterfall can disappear behind trees when viewed from the path where players actually walk.
This is a different job from the site's ACNH map layouts guide. That guide helps you choose a map with useful fixed features; the 3D workflow begins after you understand those constraints and want to test how terrain, buildings, and routes work together.
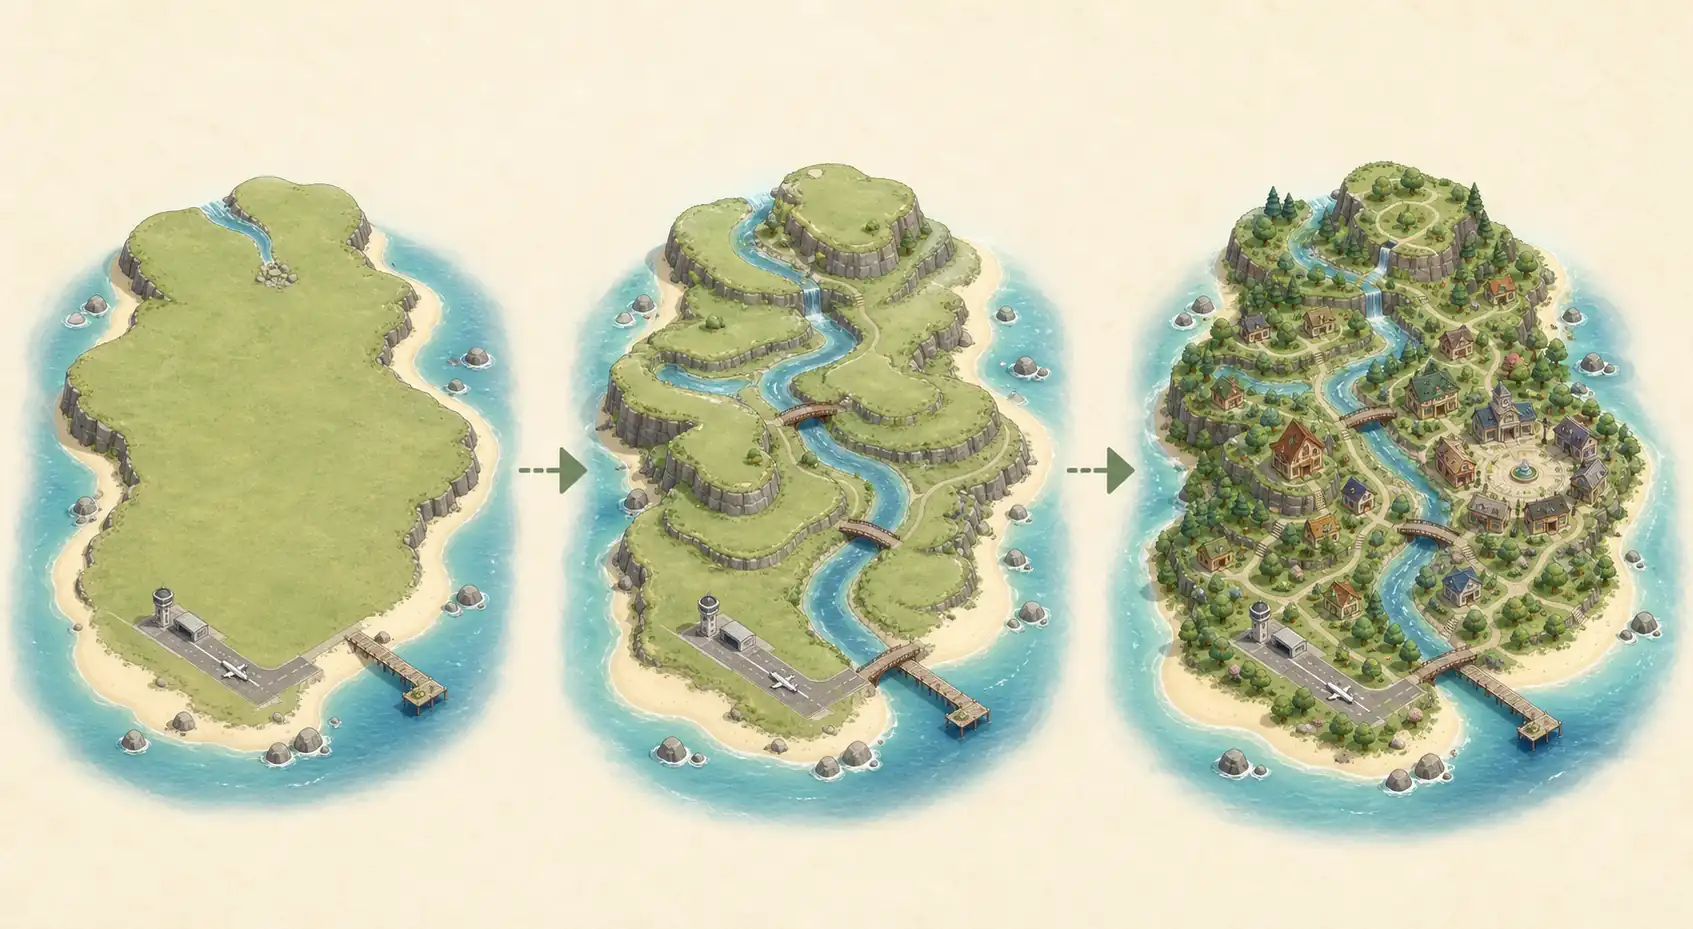
- Mark fixed landmarks. Place the airport, Resident Services, river mouths, pier, beaches, rocks, and secret beach before shaping the rest of the island.
- Block the terrain layers. Decide where the first, second, and third levels should run, then reserve space for stairs and safe walking routes.
- Draw the main movement loop. Connect the airport, Resident Services, shops, museum, homes, and daily resource areas before adding scenic dead ends.
- Test sightlines. Check what players see when they cross a bridge, climb an incline, enter a neighborhood, or approach a landmark.
- Keep a simpler fallback. Save one lower-terraforming version so the build remains practical if the ambitious plan becomes too expensive or cramped.
3D Island Planner Use Cases That Actually Help
The best 3D planning ideas solve a visual or movement problem. Use the following patterns to decide whether a 3D model will add useful information or simply make a simple plan look more complicated.
Cliff and Waterfall Stacks
Build a layered cliff concept with water flowing through it, then inspect whether the levels feel connected instead of stacked like separate platforms.
- Best for
- Natural islands, scenic overlooks, museum hills, and waterfall entrances.
- Planner setup
- Draw the water path first, add cliff shelves second, and reserve a readable staircase route on both sides.
- Build note
- Leave open sightlines around the waterfall. Dense trees and tall furniture can hide the feature once you are in-game.
River and Bridge Alignment
Use the 3D view to see whether bridges connect useful destinations or merely create attractive but awkward crossings.
- Best for
- Canal towns, river loops, fishing areas, and islands with several separated districts.
- Planner setup
- Place the daily route between homes, shops, and Resident Services before choosing bridge locations.
- Build note
- A bridge that looks centered from above may feel off-center when approached from a lower path or a cliff stair.
Tiered Villager Neighborhoods
Arrange houses across one or more levels to compare privacy, shared yards, paths, and the amount of incline work required.
- Best for
- Organized neighborhoods, themed residential districts, and islands with strong vertical design.
- Planner setup
- Place homes as simple blocks first, then add shared parks, fences, stairs, and service paths.
- Build note
- Keep at least one easy route through the district so daily villager visits do not become a staircase tour.
Museum and Town Sightlines
Test whether a landmark can be seen from the entrance, plaza, bridge, or main path without making the whole island feel like one straight corridor.
- Best for
- Urban islands, formal gardens, museum hills, and strong central town concepts.
- Planner setup
- Choose one or two intentional viewpoints, then place buildings and cliffs around those views instead of blocking them accidentally.
- Build note
- Use open space near the landmark. A crowded foreground can make a large building feel smaller and harder to read.
Coast, Pier, and Beach Connections
Check how coastal paths connect the pier, beach entrances, rock areas, and ocean-facing homes when the main island is already divided by cliffs.
- Best for
- Resort islands, beach markets, fishing villages, and coastal walking loops.
- Planner setup
- Trace beach access first, then connect the coast to one reliable inland route instead of creating isolated beach scenes.
- Build note
- Beaches are narrow. Plan small scenes with breathing room rather than filling every edge with furniture.
Low-Terraforming Fallback
Use the same theme with fewer height changes, fewer bridges, and more paths at ground level so the island is easier to finish.
- Best for
- Returning players, no-terraforming builds, busy players, and designs that need a realistic backup.
- Planner setup
- Duplicate the main concept, flatten only the sections that block movement, and preserve the strongest focal point.
- Build note
- A finished simple island usually serves you better than an ambitious 3D plan that stays unfinished.
A Reliable 2D-to-3D Planning Workflow
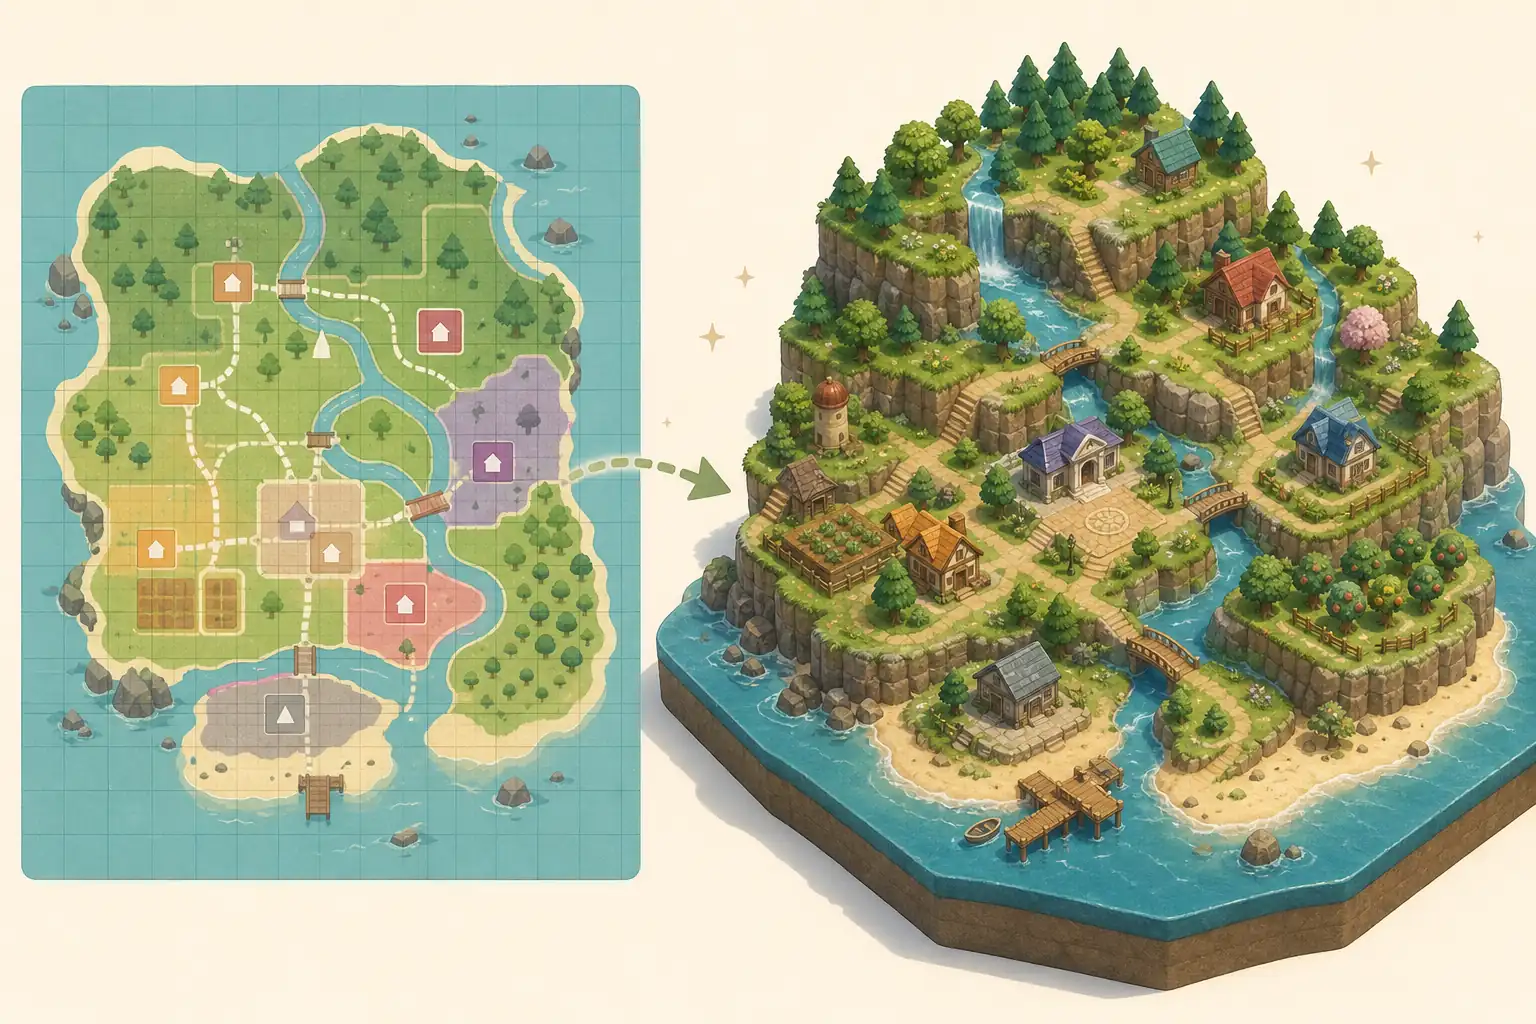
Start with a fast structural pass, then use 3D only where the extra perspective changes a decision. The site's ACNH Island Planner Template is useful for listing fixed landmarks and build order, while the island planning guide helps turn those decisions into zones and routes.
Do not move every building in the model before you know the main route. First prove that the airport, Resident Services, shops, museum, homes, and key resource areas can connect. Then spend the 3D effort on the cliffs, rivers, views, and themed spaces that make the island feel distinct.
| Planning stage | What to decide | What to verify before building |
|---|---|---|
| Fixed map pass | Airport, Resident Services, river mouths, pier, beaches, rocks, and secret beach. | The concept respects the map you actually have instead of copying a different island. |
| 2D structure pass | Zones, main paths, house grouping, shop and museum districts, and fallback space. | Daily errands can be completed without unnecessary backtracking. |
| 3D terrain pass | Cliff levels, waterfalls, bridge approaches, inclines, and important sightlines. | The terrain adds value without blocking routes or requiring too many crossings. |
| Build-order pass | Which areas need moving, flattening, terraforming, or decoration first. | Expensive changes happen before small details and can be tested in stages. |
When to Choose 3D, 2D, or a Simple Template
There is no prize for using the most advanced planning format. Choose the format that answers the question you are stuck on.
Choose a 3D island planner
Best when elevation and visual depth are the main risks.
- You are designing cliffs, waterfalls, bridges, or tiered neighborhoods.
- You need to check how a landmark looks from several walking levels.
- You want a visual concept before committing to heavy terraforming.
Choose a 2D island planner
Best when exact placement and quick comparison matter most.
- You are testing several airport-to-plaza routes.
- You need to compare building footprints, zones, or map shapes quickly.
- You want to save a clean reference image for in-game construction.
Choose a checklist or template
Best when your island already works and you need a manageable build order.
- You are redesigning one area instead of the whole island.
- You want to limit building moves and expensive terrain changes.
- You prefer a practical sequence over a detailed visual model.
What 3D Island Planner Does Not Mean
The phrase 3D island planner describes a planning format, not a Nintendo product category. Different community tools may have different controls, export options, or platform support. Read the current developer page before assuming that an older tutorial still matches the available build.
Keep the distinction clear when you compare tools: a planning model helps you visualize an idea, while Animal Crossing itself remains the place where you move buildings, terraform, place items, and live with the finished route.
Not an official Nintendo editor
A community-made tool should be described as a planning aid, not as an official Animal Crossing feature.
- Use the developer source for current availability.
- Do not imply Nintendo support or endorsement.
Not a save-file editor
A 3D concept does not automatically move buildings or write changes into your game save.
- Treat the model as a reference image or planning draft.
- Apply changes through the normal in-game workflow.
Not a guarantee of exact placement
The final game build can expose spacing, path, bridge, incline, or movement problems that a concept view misses.
- Test one zone at a time.
- Keep a simpler fallback plan before flattening or moving many buildings.
3D Island Planner Checklist Before You Start
Use this short checklist before you turn a beautiful 3D concept into a costly in-game redesign.
Map and movement
- Fixed landmarks are placed before decorative terrain.
- The airport-to-Resident-Services route is clear.
- Shops, museum, homes, and daily resource areas have practical connections.
- Every major district has an entrance and a usable exit.
- Bridge and incline locations solve movement problems instead of only filling empty corners.
Terrain and build order
- The most important waterfall or cliff view has a clear approach.
- The plan does not depend on more crossings than you can reasonably build.
- There is open space for seasonal changes and future redesigns.
- A low-terraforming fallback is saved before major changes begin.
- You will build and test one zone before copying the idea across the whole island.
Common 3D Planning Mistakes to Avoid
A 3D model can make a concept feel finished before it has been tested as a daily playable island. Watch for these traps.
- Planning only from the bird's-eye view. A map can look balanced while the playable route is cramped, hidden, or full of awkward stair turns.
- Adding height before movement. Cliffs and waterfalls are easier to admire after the core path loop and building access already work.
- Copying an old tool tutorial blindly. Community tools change, disappear, or support different platforms, so check the current developer source before relying on old steps.
- Treating the model like a save editor. A 3D plan is a visual reference; it does not replace in-game construction, testing, or normal save management.
- Skipping the fallback version. A simpler plan with fewer levels can save the project when the most ambitious version becomes expensive or difficult to navigate.
Sources and Useful Planning References
The first link is the community developer source for the 3D planner. The internal guides provide a safer way to cross-check map constraints, routes, and build order.
- 3D Island Planner developer page - Community project page to check current availability and platform information.
- ACNH Island Designer guide - Internal guide for the site's online map planner and in-game planning context.
- ACNH Map Layouts guide - Internal guide for choosing fixed island-map features before terraforming.
3D Island Planner FAQ
Is 3D Island Planner an official Nintendo tool?
No. Treat it as a community-made planning project, not a Nintendo product or endorsed Animal Crossing feature. Use the developer page to check current availability and describe its output as a concept or reference.
Does a 3D island planner edit my ACNH save file?
No. A planning model does not automatically move buildings, terraform your island, or write changes into your save. You still need to apply and test the design through the normal in-game workflow.
Should I use a 3D or 2D island planner?
Use 3D when height, waterfalls, bridges, and sightlines are difficult to judge. Use 2D when you need fast grid placement, map comparison, building footprints, or a clean construction reference. Many players get the best result by using both.
Can I trust an old 3D planner tutorial?
Use old tutorials for general ideas only. Community tools can change their controls, files, or supported platforms. Check the current developer source before assuming that a download, import step, or export option is still available.
What should I plan first in 3D?
Start with fixed landmarks, the airport-to-Resident-Services route, major cliff levels, river crossings, and the largest buildings. Add small furniture scenes only after the main movement and sightlines work.
Is a low-terraforming plan still useful?
Yes. A low-terraforming version is a valuable fallback for players who want to finish sooner, avoid many building moves, or keep daily routes simple. Preserve the strongest focal point and simplify the rest.
Turn the 3D Concept Into a Buildable Island
Use the visual model for terrain decisions, then switch to the ACNH Island Planner for precise zones, paths, buildings, rivers, and a reference image you can follow in-game.
Open the ACNH Island Planner